Skip to Main Content

Devices

Learn More

Materials are on a first come, first served basis only and are subject to availability.  Holds cannot be placed on equipment.  Different loan periods may apply for other items. When you check items out, your library account will indicate the due date for each item.  

Length of check-out: 2 nights. No renewals.

Returns: Equipment must be returned directly to Service Center staff persons for processing.   Borrowing is not available for this item again until the following business day.

What is included with check-out:

- Cannon PowerShot A4000 IS

- USB cable for import

- Battery and Memory Card

Complete users manual: Canon PowerShot

Where to Buy: Canon online

Using the Canon Powershot Digital Camera

Canon PowerShot A4000 IS

Yarr! You've found the Canon PowerShot guide! Please use the reference photos at the end of this guide in tandem with the instructions in the guide. As always, ask a Freedman Center Student Assistant if you need any assistance!

Getting Started:

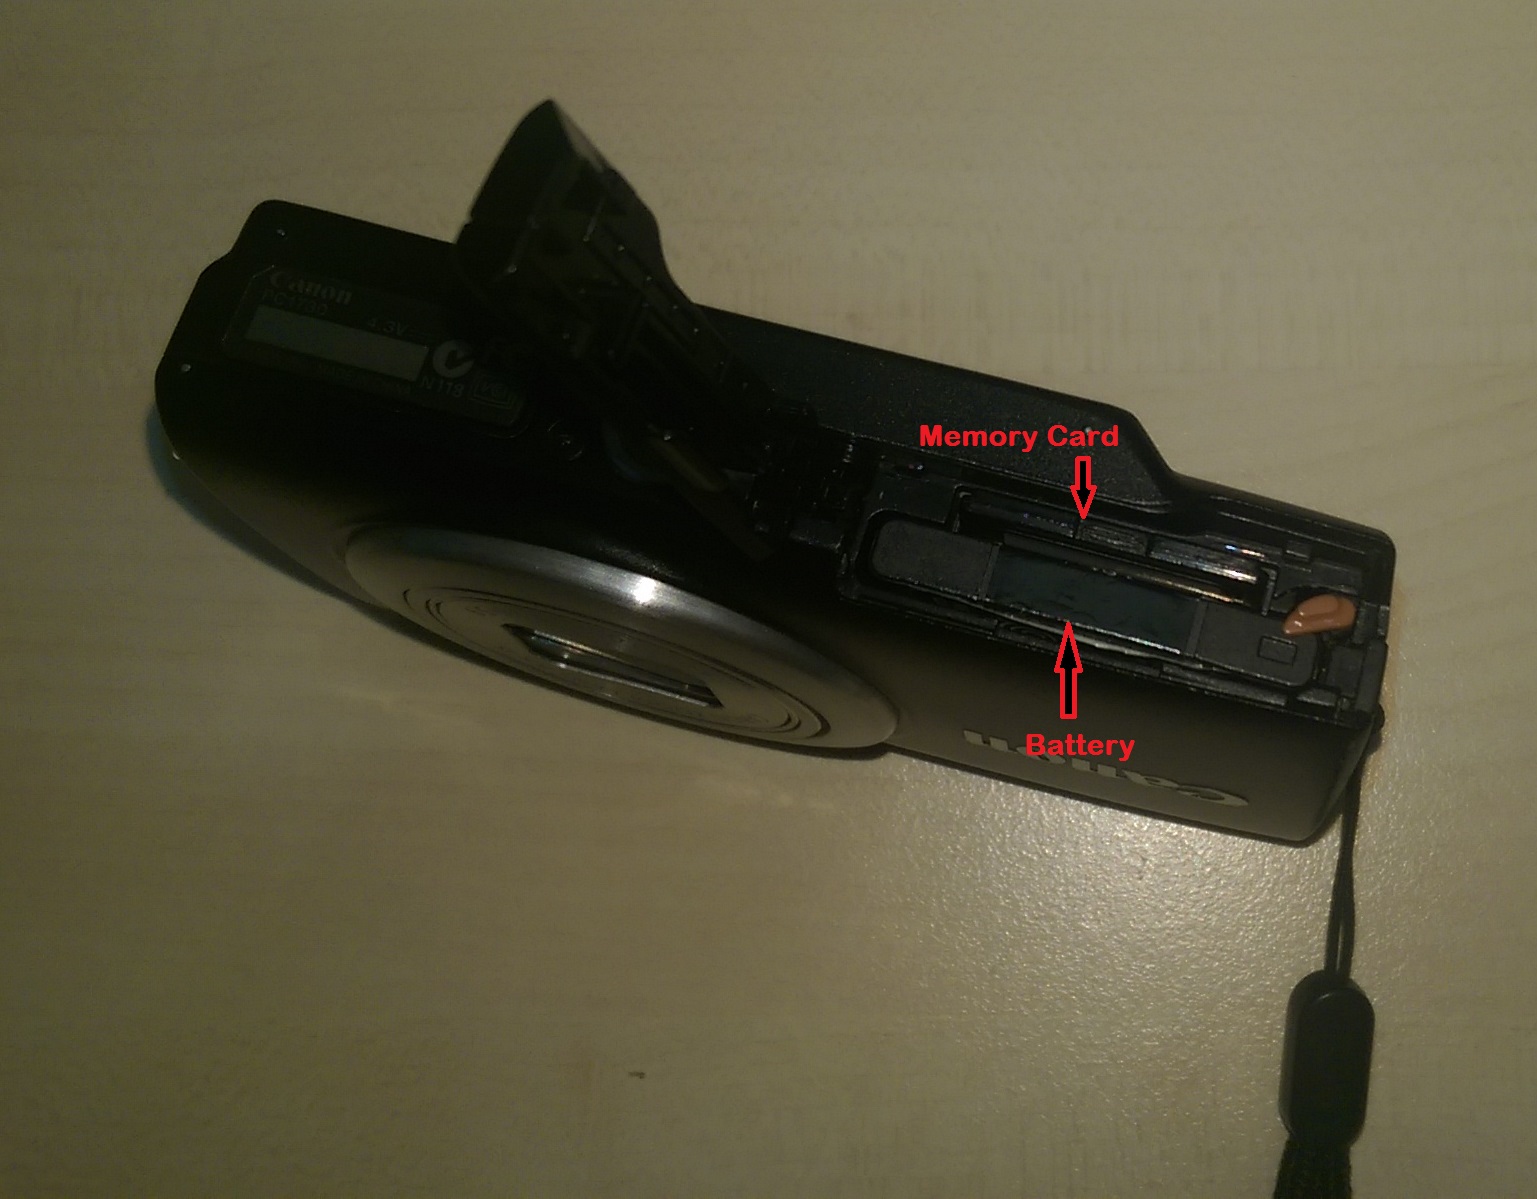
  • Make sure that both the memory card and the battery are present and placed in the bottom compartment of the camera.
  • To turn on, press the “on/off” button on the top of the camera. Once on, the lens should extend allowing you to view what is framed by the camera as well as display settings on the camera’s screen .
    • To remove the displayed settings from the screen press the “Disp.” at the bottom of the circular “Func. Set” button to the right of the screen.
  • The Shutter can be found on the top of the camera, to the right of the power button. The Shutter will be what you press down in order to take a picture.
    • There is a lever that twists around the Shutter that will allow you to either zoom in or zoom out the lens in order to adjust the frame to your desired view

More options on the Camera

  • The video recording button can be found to the right of the display screen, identified by a red recording circle with an image of a camera next to it. Pressing this button will allow you to record, press the button a second time to stop recording.
  • The button found at the opposite end, illustrated with a blue right arrow, is the “Playback” button that will allow you to view your photos and videos.  
  • Press the “Func. Set” button at the center of the circle in order to access the settings for the automatic camera timer, adjust the screen size of your images, as well as adjust to the desired definition levels of your footage.
  • The “Menu” button to the right of the camera allows you to adjust general camera settings, such as the camera’s brightness and blink detection software.
  • The button to the right of the “Func. Set”, shaped like a downwards arrow will allow you to turn the flash on and off per your needs.
  • The button to the left of the “Func. Set” is the “Macro” button, shaped like a flower. It will allow you to restrict the focus of the camera to subjects at close range.
    • Press the button a second time if you wish to shoot far away subject, this is called “infinity”.
  • The button to the top of the “Func. Set” plays two roles. When on camera mode it will adjust your screen for filming. When in “Playback” mode and looking at previously taken photos, it will allow you to delete images.

Transferring Photos onto your computer
  • In order to transfer the images from the camera to the computer you must connect the two by using the adapter cord provided.
    • The camera must be on while plugged in, in order for the images to be transferred.
  • The camera’s icon will appear on the desktop. Double-click on the icon to open the folder.
    • Select “Import pictures and videos”
    • Depending on your computer, you will be given the option upon import of where to save your photos. Once selected, the import will begin.
    • Once the photos are fully imported you are free to disconnect the camera. The process is now complete.