Skip to Main Content
Before you begin
- Create a folder in the D: Drive Storage and name it with your Case ID (i.e. abc123).

Removing Moire Patterns in Photoshop
- On the desktop, open Adobe folder and then open Adobe Photoshop CC 2018.

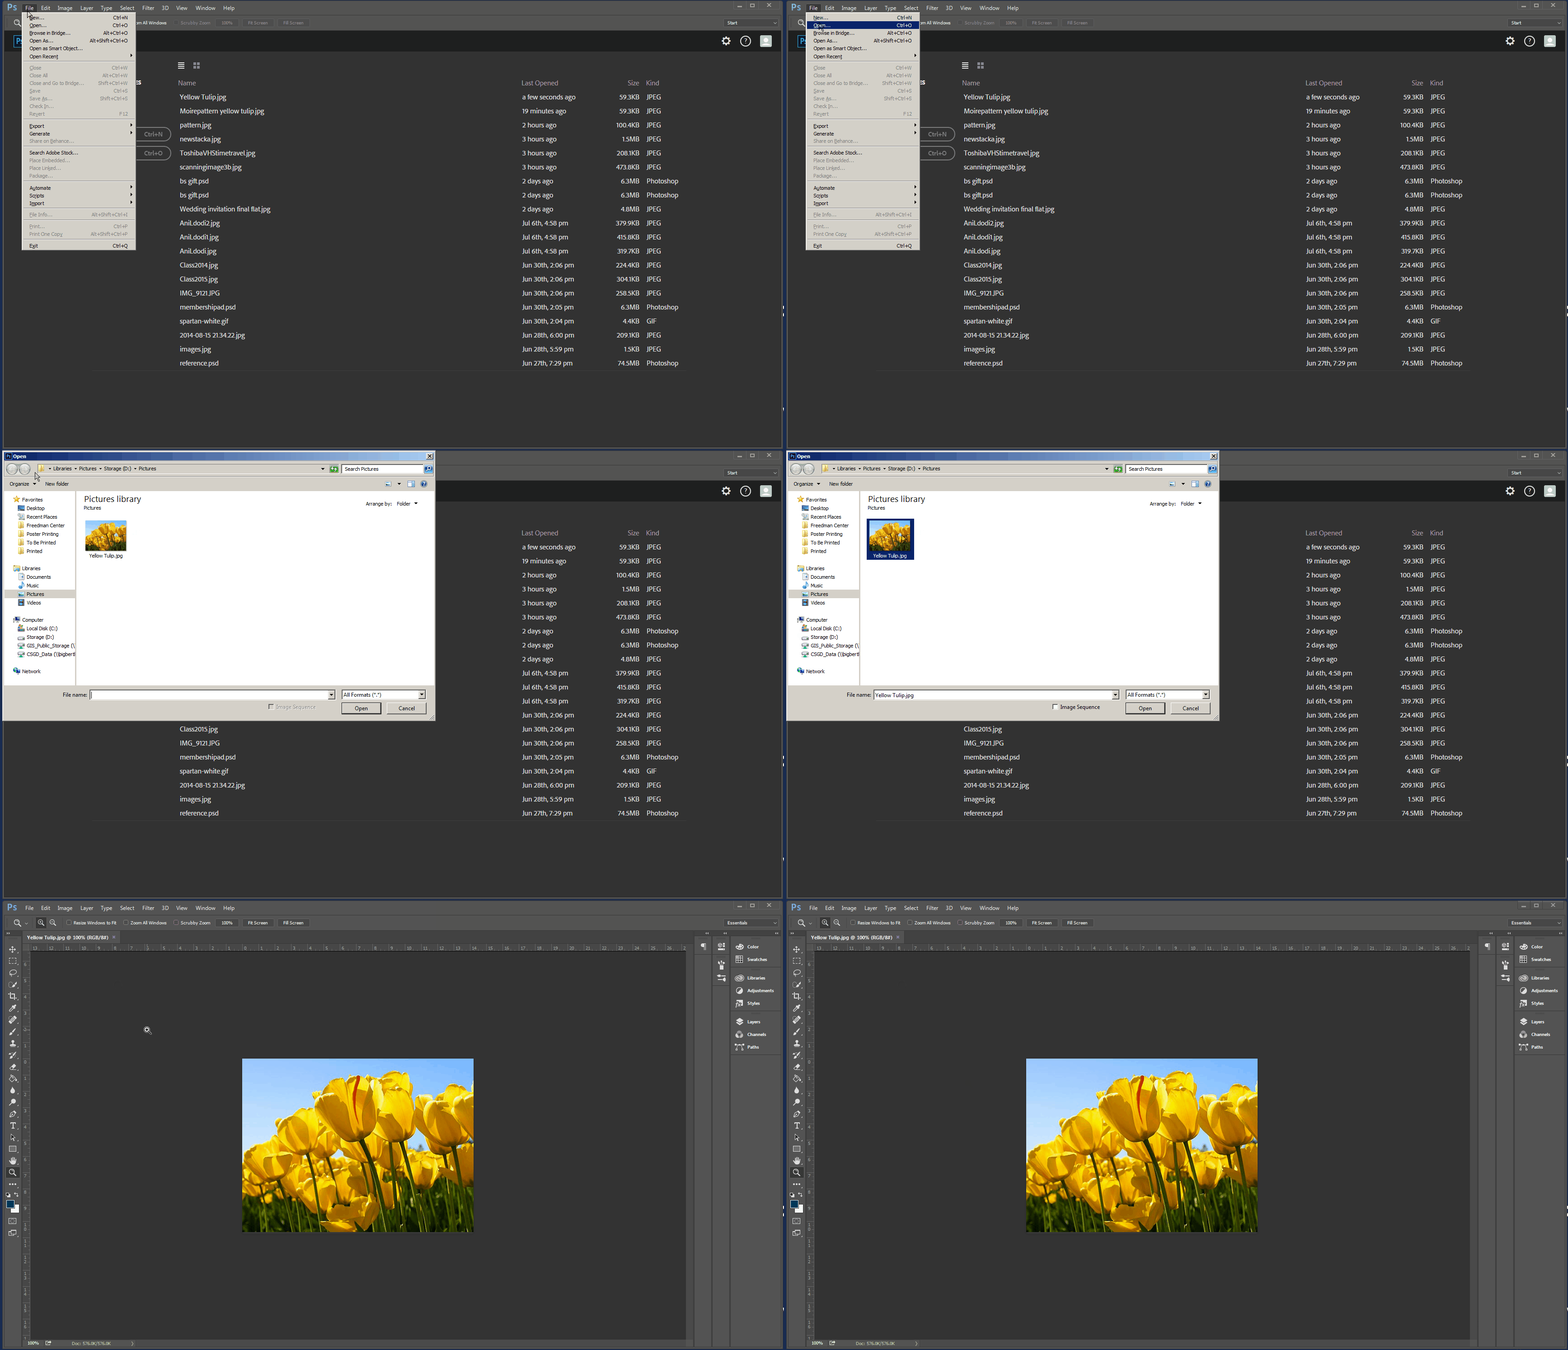
- Import your image into Photoshop by going to File > Open and then selecting your file.

- If a moiré pattern (pattern of dots) appears when scanned, scan the image again but double the DPI to at least 800.

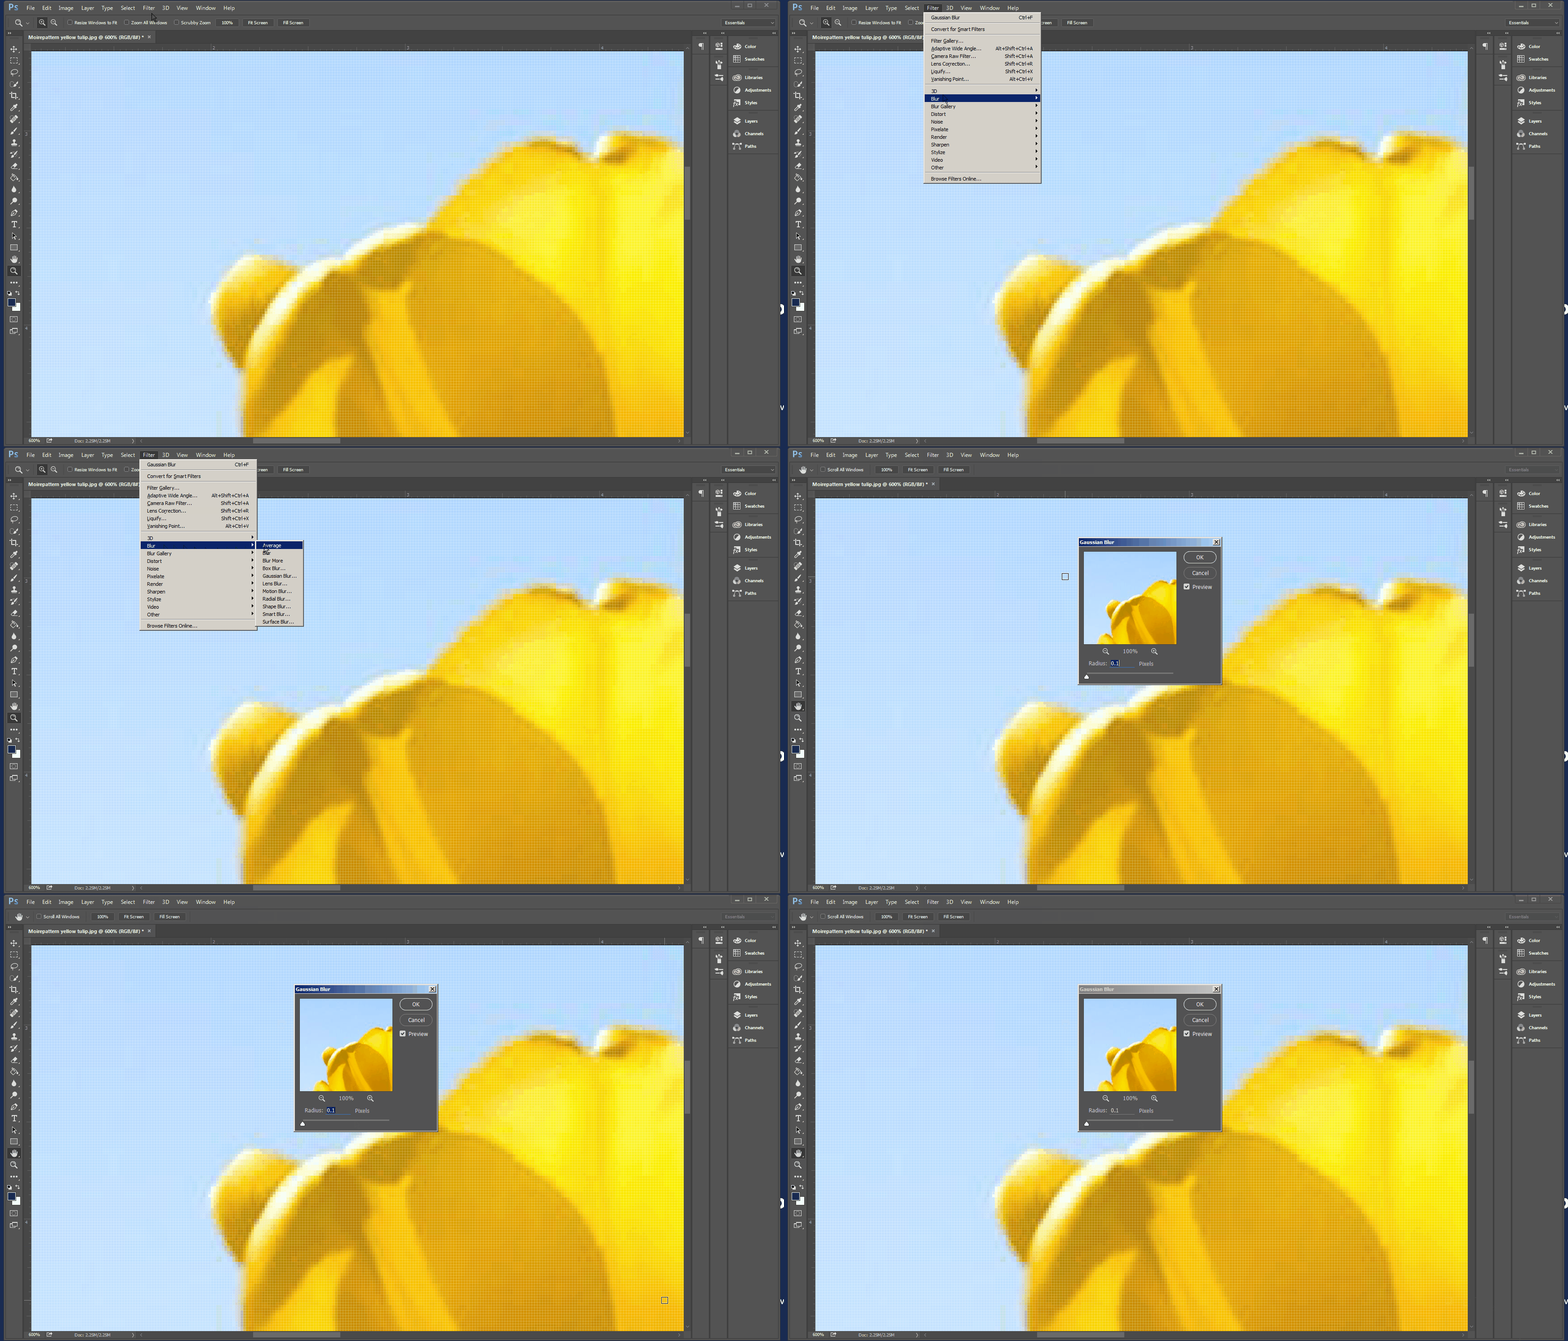
- After scanning into Photoshop, select the ‘Zoom’ tool and click '100%.’ Scroll over to an area of solid color which shows the moiré pattern.

- Then select Filter > Blur > Gaussian Blur.

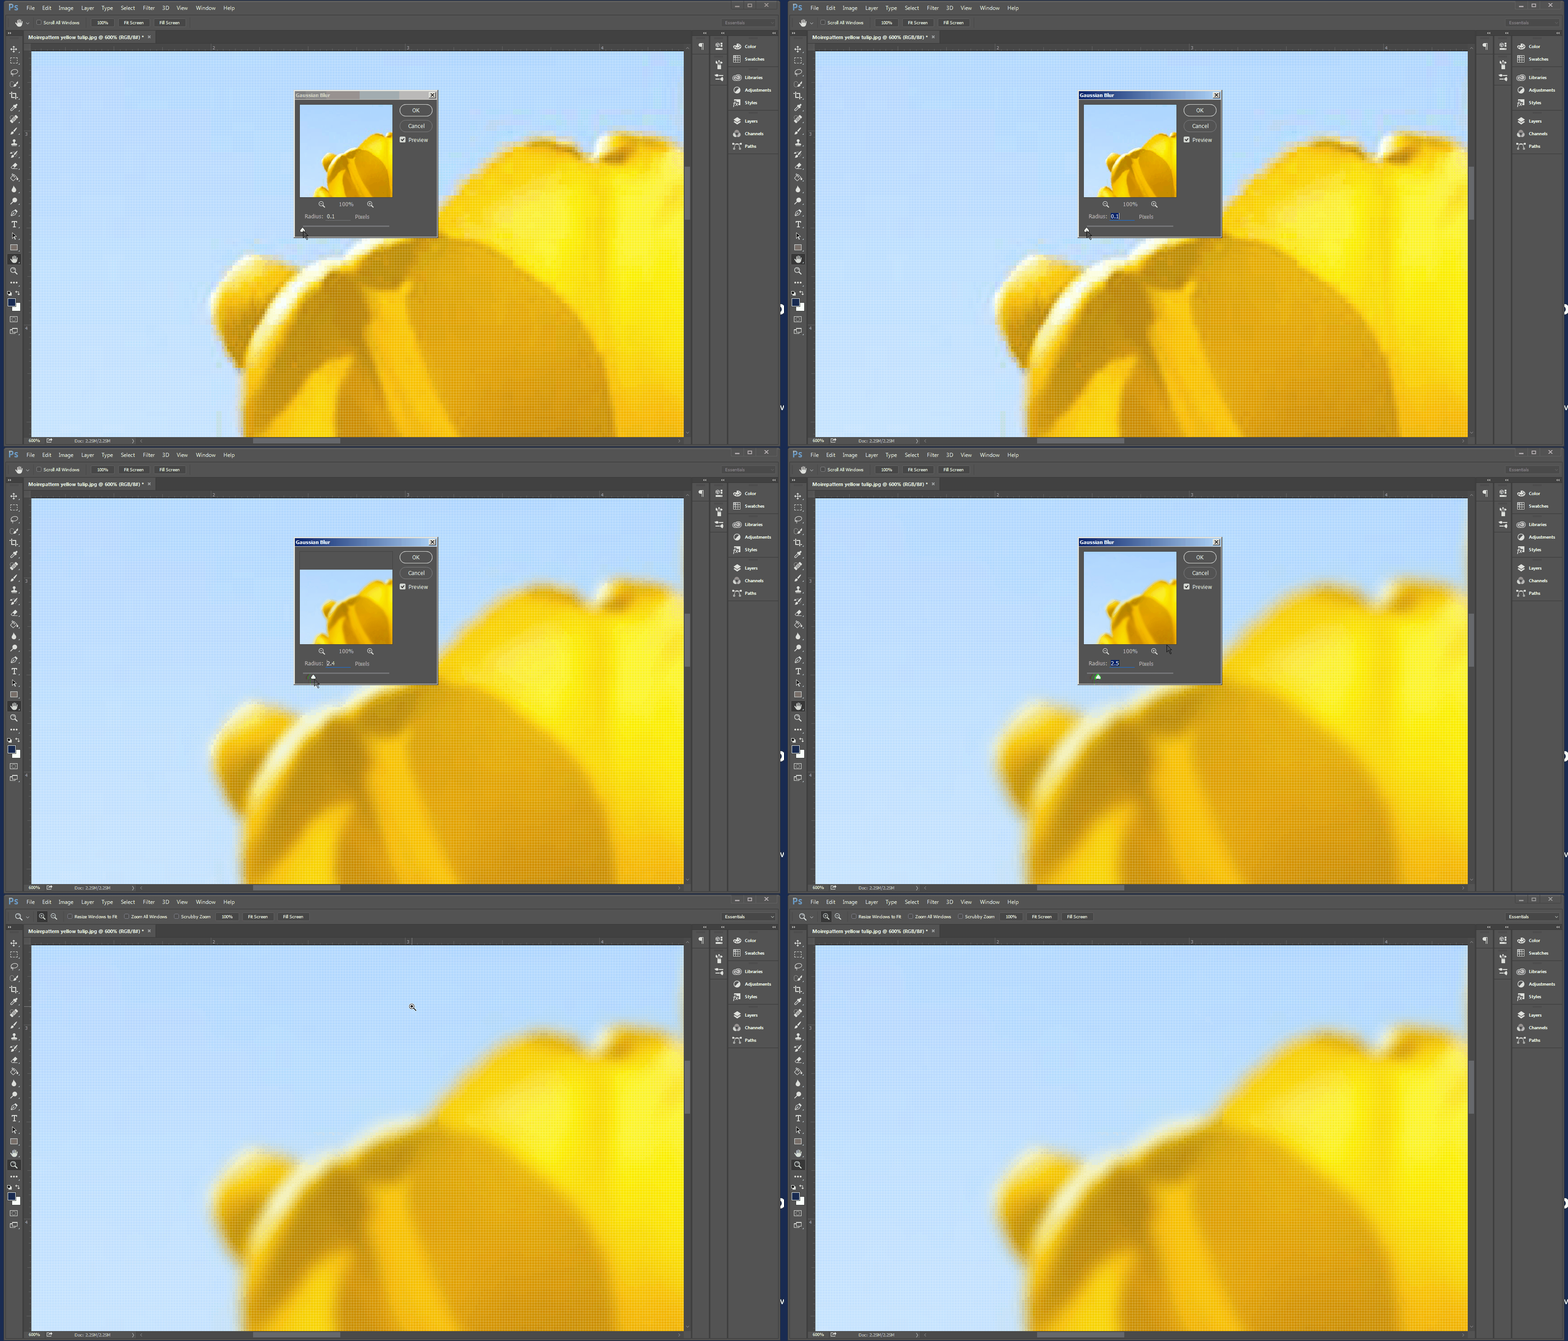
- Increasing the radius using the scrub bar at the bottom will increase how much the image is blurred. Click, hold, and drag the image in the center of the Gaussian Blur window to view an area of solid color. Click ‘OK’ to blur the image. This step can be repeated until the dots are gone.

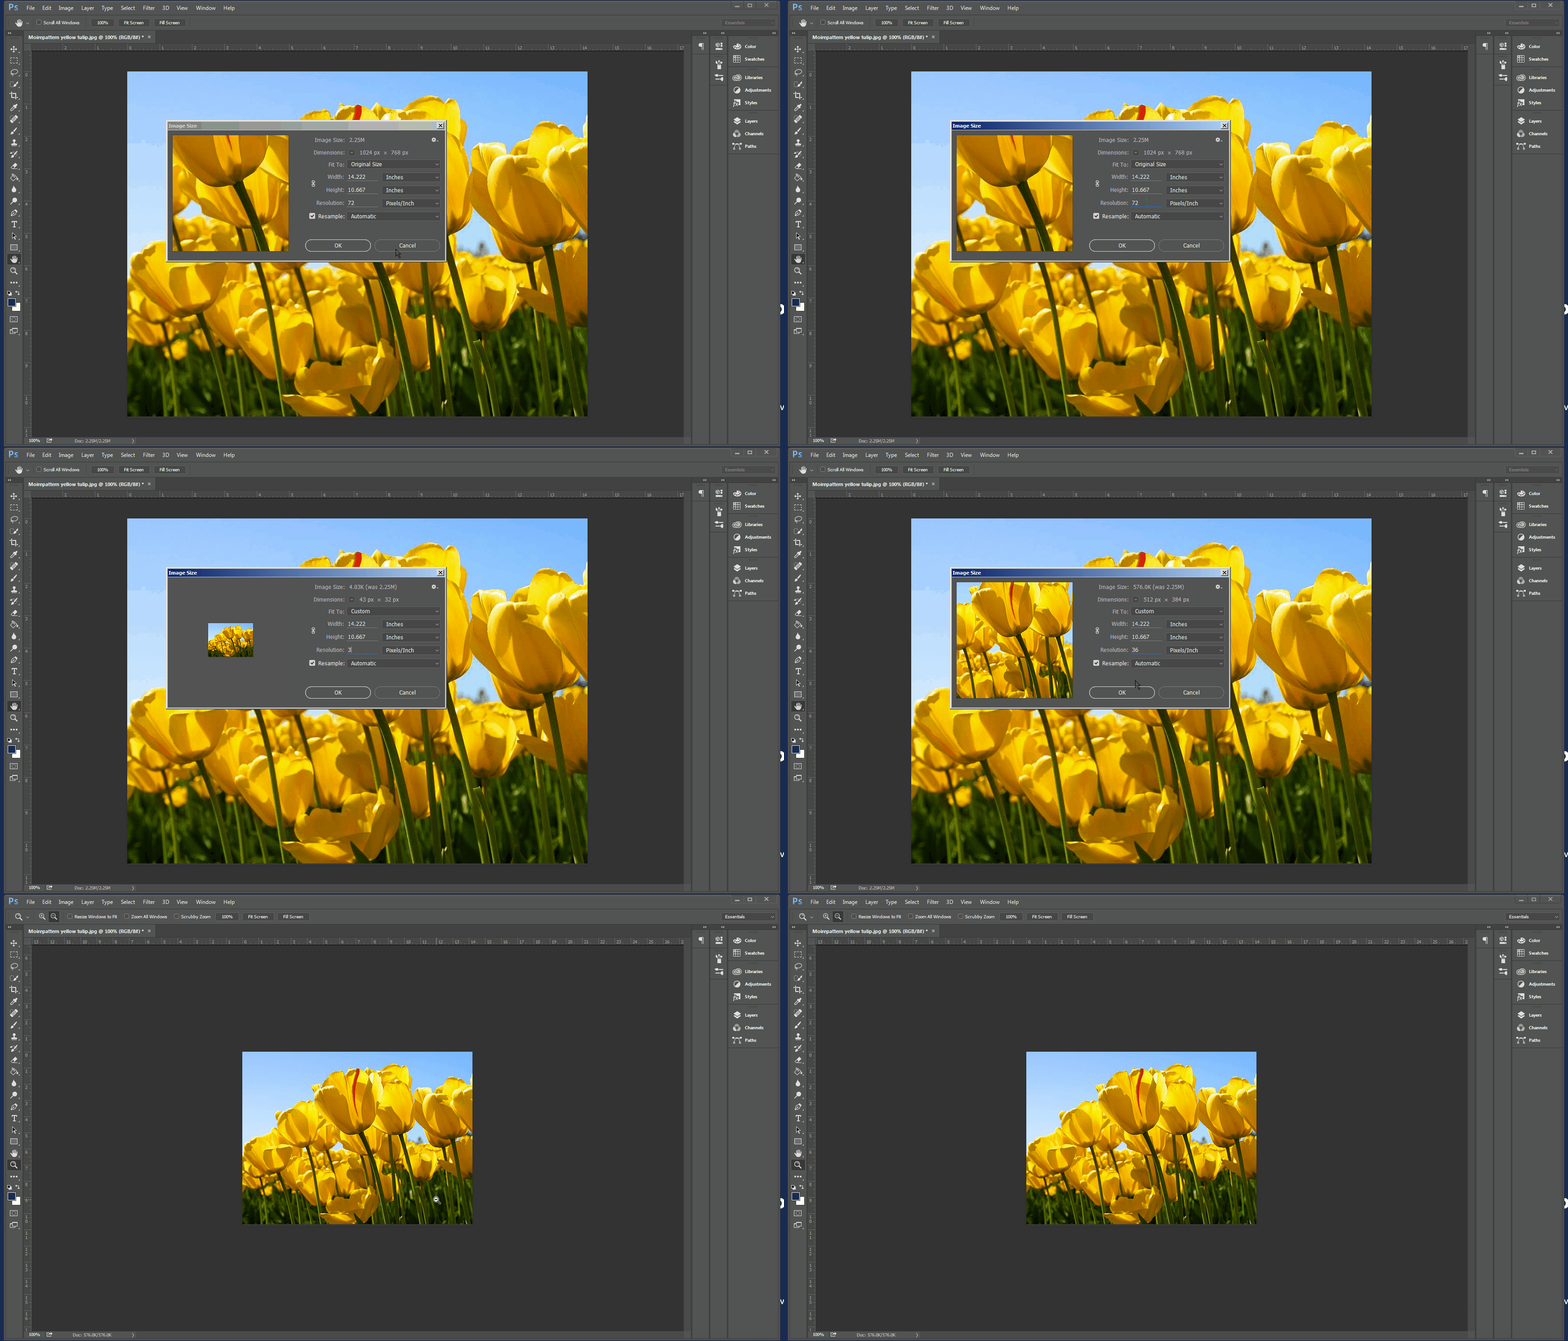
- Then select Image > Image Size.

- Lower the resolution by half and click ‘OK'.

- Save image to your D: Drive Storage folder named after your Case network ID (ex. abc123).


