Skip to Main Content
Requirements for Passport Photos
Taking a Passport Photo
- Have a photo taken of you. These parameters MUST be met:
- Front view, full face, open eyes, closed mouth, and natural expression
- Full head from top of hair to shoulders
- Wear normal street attire
- The head should not be tilted
- Plain white or off-white background
- No shadows on face or in background
- No glasses or sunglasses; no hat or head covering unless worn daily for religious reasons
- Normal contrast and lighting
- Photo must be in color
- Photo must be no older than 6 months
- For full regulations, see the official US Passport Photo Requirements

- NOTE: Copied or Scanned Images are not acceptable for Passport Photos!!
Getting Started
- In the Freedman Center, open the Storage (D:Drive) folder on the desktop and create a new folder named after your Case network ID (ex. abc123).

- On the Desktop, open the Adobe folder and then open Adobe Photoshop CC 2018

- Import your image into Photoshop by going to File > Open and then selecting your file from a flash drive or camera. (Copied and/or scanned images are not allowed by passport photo standards).

Cropping the Image
- Select the crop tool.
- With the crop tool selected, view the crop bar option at the top. In the drop down options, select 1x1 (Square).
- Click and drag the crop selector so that it includes your shoulders and ends just above the top of your hair. Once the cropped area appears click and drag the corners to adjust the size of the area or click and drag anywhere inside the cropped area to move it.
- After your 1x1 image is cropped, the crop bar at the top will show the option to change the size. Make your image 2x2 and click the check mark at the end of the bar to increase your image size.
- Once processed in Photoshop the image should adhere to the following standards:
- The photo must measure 2in x 2in.
- The head, measured from the bottom of the chin to the top of the hair, should be between 1 to 1-3/8 inches.
- The head should be centered in the photo.
- The head should take up about 50% of the photo.

Making sure the image is the right size
- Select Image > Image size. Make sure you image is at 2x2 inches and at a resolution of 300.

Creating a 4x6 with multiple passport photos
- Press CTRL+A to select all of the image and press CTRL+C to copy the image.
- Click Image > Canvas Size.
- Adjust the Canvas Size to 6in width by 4in height to print on 4x6 photo paper. Then click on the red block below to shift the first photo.
- Click Ok.
- Press CTRL+V to paste the copy of the photo.
- By using the move tool, move the picture around to make it fit.
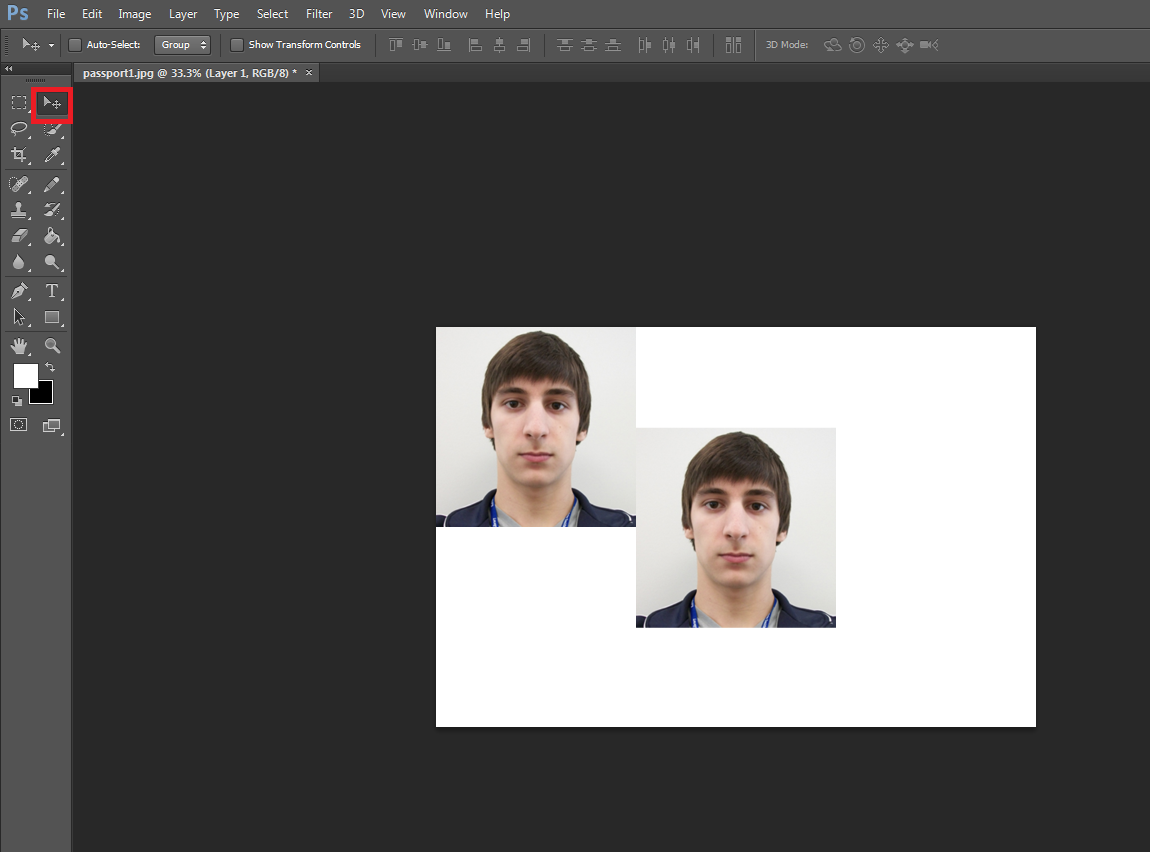
- Repeat the step above to form a picture with 6 passport photos as shown below.

Saving your image
- Save the image to your newly created folder as a .JPEG.
- If you plan on uploading your photo for a Visa application adjust the quality so that the photo is less than 240 KB.
- If you plan to print out the photo for a passport picture, save it as .JPEG quality 12.
- If printing your photo, it must be printed on thin photo-quality paper.


