Skip to Main Content
Before you get started...
- Create a folder in the D: Drive Storage on the station you are working at, and label it with your network ID (i.e. abc123). The icon for D-User Storage is currently designated Storage (D) - Shortcut on the desktop of the film scanning computer.
- To scan black and white AND color film, you will need to check out the film adapter at the main service desk on the first floor of KSL(not Freedman center front desk). Ask a Freedman center staff if you need assistance.
Getting Started
- For scanning transparencies, please see the Scanning Transparent Media tutorial.
- Turn on the Epson Perfection 4990 scanner. Note: the scanner is ready to use when the lights at the front stop flashing.

Setting up the scan
- From the desktop, find the scanner folder. Navigate to the EPSON scanning software from within.

- Then select the EPSON Perfection 4990 from the list of scanners. Then click OK.

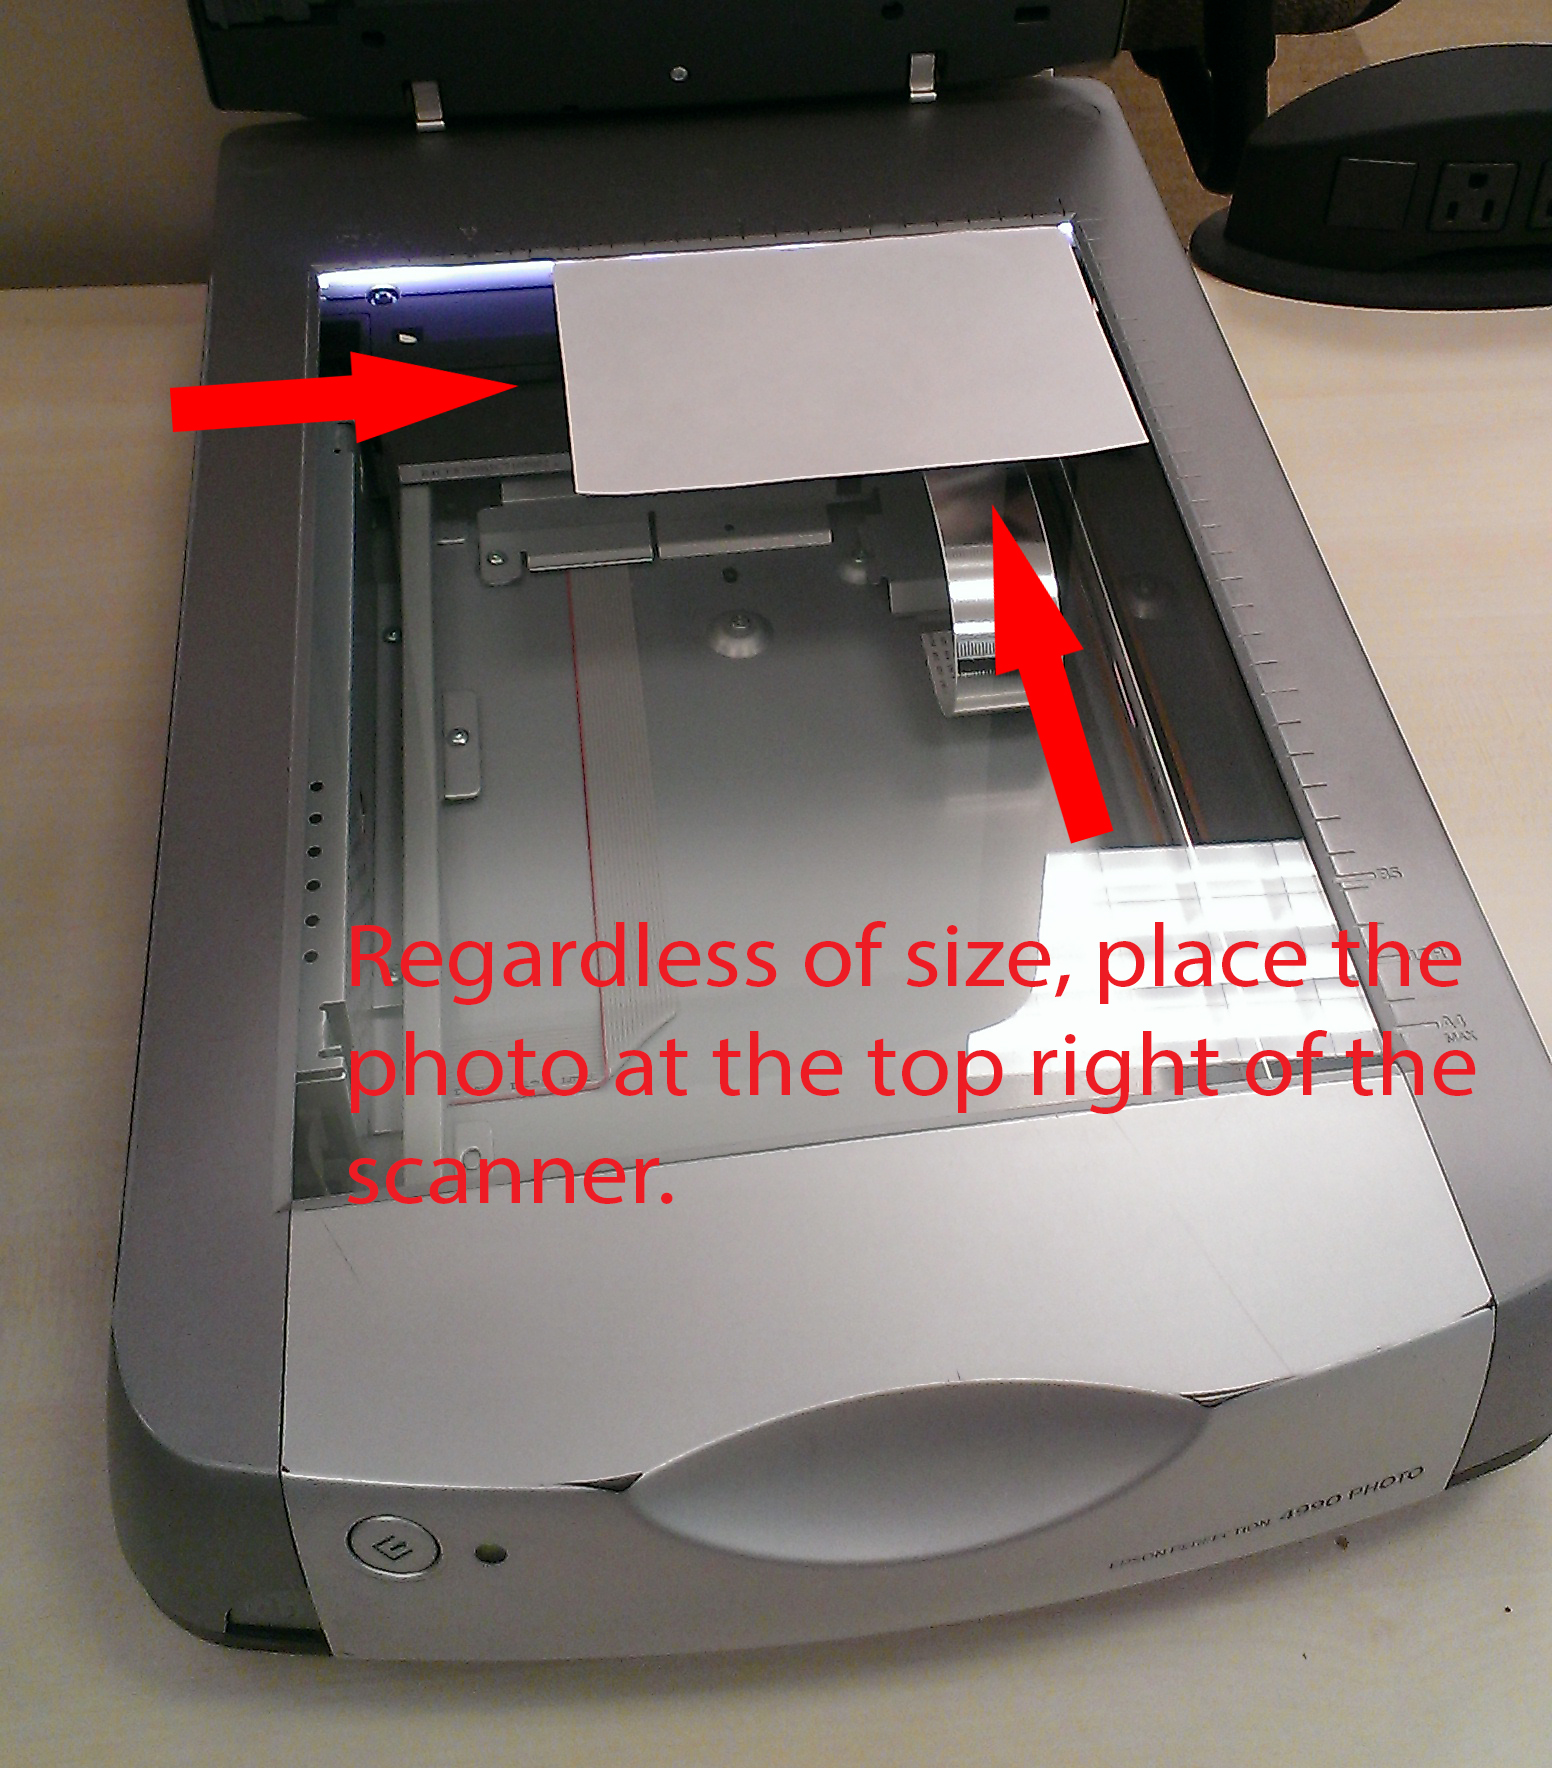
- Place your item face down on the scanner bed making certain it is aligned with the edge of the bed, in the top right corner.
- The longest dimensions that this scanner can read are A4 or Letter size dimensions (8.5 in x 11 in). If it is larger, but it still fits in the scanner, it will only scan the paper within the A4 dimensions.
Previewing & Scanning
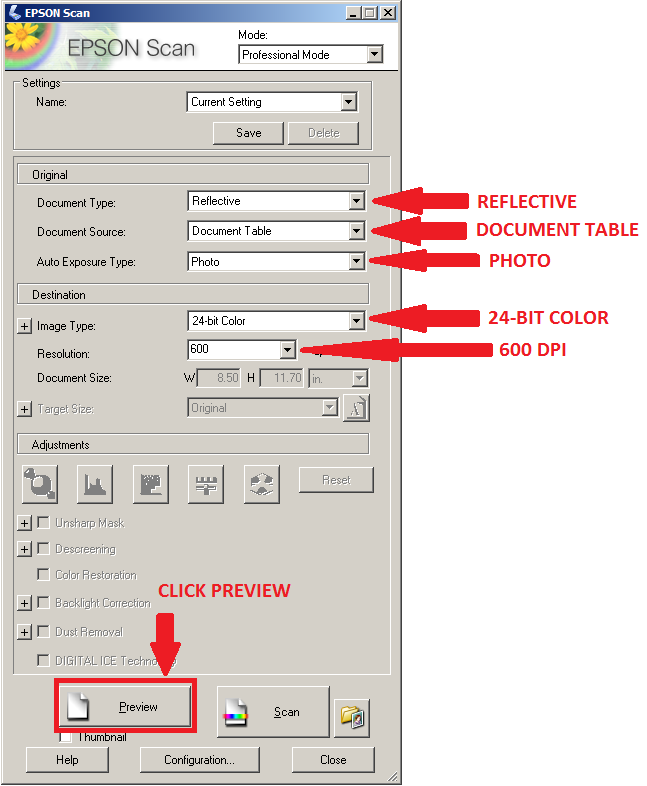
- Click the Preview button to preview the scan after selecting the proper settings:
- Document type > Reflective
- Document Source> Document Table
- Auto Exposure Type> Photo
- Image type > 24 bit color
- Resolution > 600 dpi
- In the preview window, use the cursor to draw a box around the desired area to be scanned. A box of “marching ants” should appear. This box can be adjusted as needed. Only the image within this box will be scanned. Note: The fine tune cropping of your image will take place later in post processing.
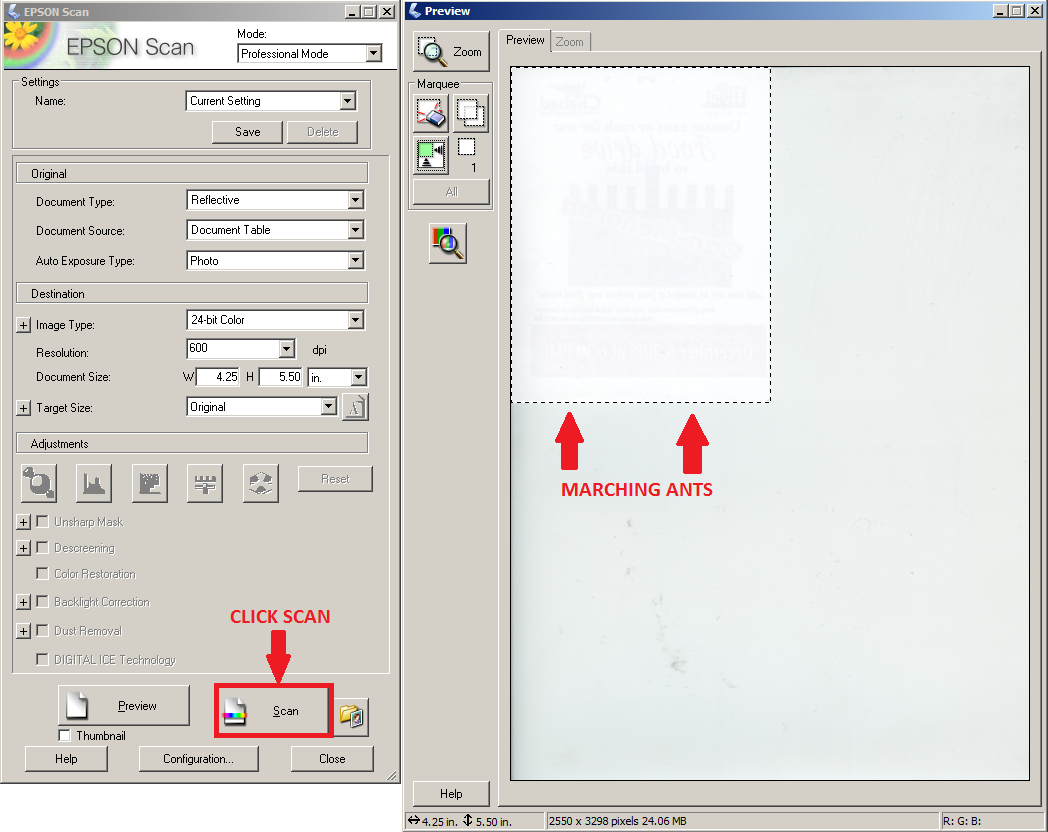
- Click the Scan button to scan the document once you have adjusted the marching ants to fit your scan.
- This screen should pop up.
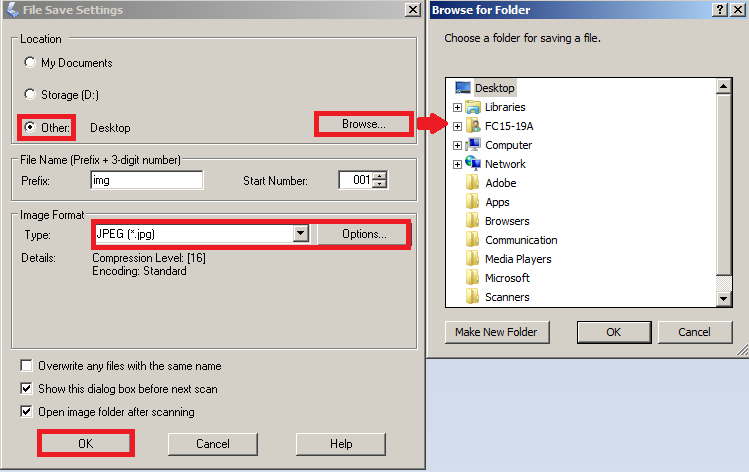
- After clicking this button, you will be prompted ot change the save settings for your scan. Choose Other ► Browse for the file location and navigate to your folder on the D: Drive.
- If you need to make a new folder make sure you have Storage (D:) highlighted before clicking New Folder, or the folder will be made elsewhere. (go to the next picture and instruction)
- Otherwise, scroll through Storage (D:) until you find your folder and hit OK. (Skip the next picture and instruction)

- Name your folder and click OK.

- For the rest of the instructions refer to the Save File Settings Window's picture.
- You can change the prefix for your file and the start number when it is saved. If left at the default, the scan will be saved as "img001" in your folder.
- Make sure that you are saving your image in the format you desire as well. You can change this format from the dropdown menu. Once you have setup your save settings completely, click OK.
- You can now find your file in the location you designated after the scan completes.
- For further instruction on scan manipulation, see Basic Image Manipulation in Adobe Photoshop.
- More information may be found in the User Guide.


